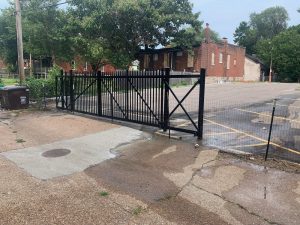
How Often Should an Automated Gate System Be Serviced?
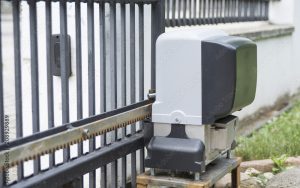
An automated gate system goes through hundreds of open and close cycles every month, and every cycle puts mechanical and electrical stress on its components. Without a structured service schedule, that daily wear builds up silently until a minor issue becomes a full system failure. Gate automation depends on consistent professional attention to keep every mechanical and electrical component working at full capacity. Knowing how often to schedule that service is the foundation of a maintenance plan that protects the system and extends its lifespan for years to come. Why Does an Automated Gate System Need a Regular Service Schedule? An automated gate system handles repeated mechanical and electrical stress every day, and without scheduled service, that stress compounds across every component until repairs become unavoidable. Here is why a regular service schedule matters: To understand how neglected service leads to system-wide damage, read our guide on What Happens If an Automated Gate System Isn’t Serviced?, which explains how minor wear can escalate into costly failures. How Often Should an Automated Gate System Be Serviced? Residential Gate Systems The minimum service interval for residential automated gate systems is once every 12 months, and properties with heavier use need visits every six months. Watch for these service intervals based on usage: Skipping scheduled visits allows minor wear to accumulate on mechanical and electrical components until the system no longer performs at its designed capacity. Commercial and Multi-Family Gate Systems Bi-monthly or quarterly servicing is the industry standard for commercial and multi-family properties, given the volume of daily demand on the system. Key service considerations for commercial properties include: Delayed service at a commercial property increases the likelihood of unplanned gate repairs that consistent professional maintenance keeps under control. New Gate Installations Newly installed automated gate systems require a professional follow-up visit within the first 6 months to confirm proper operation. Standard checks performed during a new installation follow-up include: Scheduling this visit after gate installation protects the warranty and ensures the system performs as designed from the start. Factors That Affect Automated Gate Service Frequency Conditions specific to each property directly influence how often an automated gate system needs professional attention beyond the standard annual schedule. Factors that affect service frequency include: To see which specific components take the most wear under these conditions, read our guide on Automated Gate System Parts That Wear Out Over Time, which breaks down how each factor contributes to part-level deterioration across the system. What a Routine Automated Gate Maintenance Visit Covers A professional automated gate maintenance visit covers every mechanical and electrical component the system relies on to operate correctly. Areas covered during a routine visit include: Every item addressed during a routine visit directly contributes to consistent performance and a longer operational lifespan for the system. What Can Go Wrong When Gate Servicing Is Skipped Neglected service on an automated gate system allows mechanical and electrical stress to build across every component until normal operation is no longer possible. Problems that arise from skipped service include: To recognize the early warning signs before problems escalate, read our guide on Signs an Automated Gate System Needs Repairs, which covers the most common indicators that a system is overdue for professional attention. Simple Checks Property Owners Can Do Between Service Visits Basic visual checks between professional visits help identify early signs of wear before they become issues requiring immediate attention. Common checks to perform between service visits include: Anything unusual observed during these checks warrants a call to a professional technician before the next scheduled visit. Timely Service Is the Key to a Long-Lasting Automated Gate System Keeping an automated gate system in top condition comes down to knowing the right service intervals and acting on them before wear affects performance. A consistent maintenance schedule protects every component and ensures the gate performs reliably through every season. Guardian Door and Gate serves residential and commercial property owners across St. Louis, MO, with expert automated gate maintenance and professional gate repair services. Contact us or give us a call today, and let our team create a service schedule to keep every component of your automated gate system running at full capacity. Frequently Asked Questions