Garage door sensor lights are the first line of defense in any modern garage door system, and when they start to fail, the entire door can become unpredictable and unsafe. Replacing them at the right time protects your household from bigger problems and keeps the entire system running without interruption.
A failed sensor that goes unaddressed long enough can escalate from a minor garage door repair into a full replacement that costs significantly more time and money. This guide covers every key indicator that tells homeowners exactly when it is time to stop troubleshooting and commit to a full sensor replacement instead.
What Do the Different Garage Door Sensor Lights Mean?
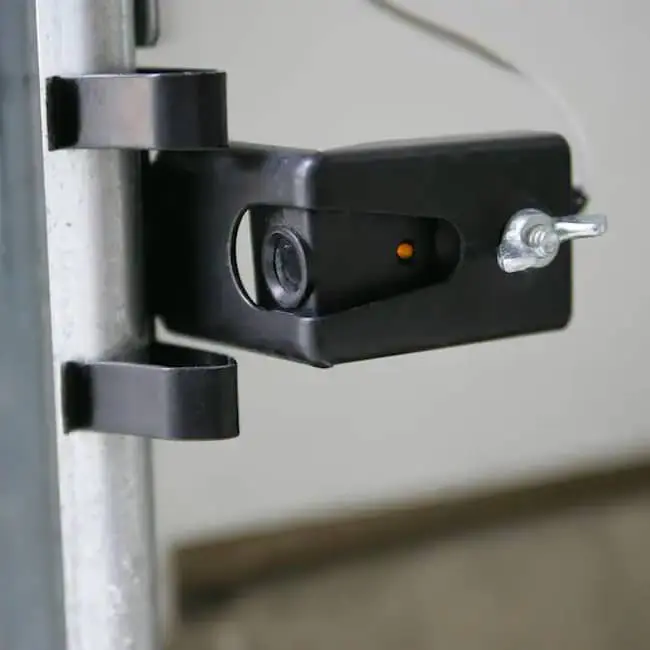
Garage door sensor lights use specific colors to communicate the exact condition of the safety sensor system mounted at the base of your door frame, and knowing what each color means is the first step in identifying whether something needs attention.
| Sensor Light Color | What It Means |
| Green | The infrared beam is connected, and the system is operating normally |
| Orange or Red | The sending sensor is powered and actively transmitting the infrared beam |
| Yellow | A warning signal indicating possible misalignment or low power on certain sensor models |
| Blinking or No Light | A sign of misalignment, obstruction, wiring failure, or a completely dead sensor unit |
To understand what each color means for your garage door, read our guide on What Color Should Garage Door Sensor Lights Be?, which breaks down every sensor light color and what it means for your system.
What Happens When Garage Door Sensor Lights Stop Working?
When garage door sensor lights stop working, the entire door system loses its ability to detect obstructions and operate safely.
Here is what can happen:
- The garage door refuses to close or constantly reverses without any obstruction
- Home security becomes compromised when the door cannot close completely
- The opener loses its ability to confirm the infrared beam is active
- Small sensor issues escalate into larger mechanical problems over time
- Erratic door movement puts household members and belongings at risk
Ignoring these problems long enough often leads to an emergency garage door repair that could have been prevented by taking action sooner.
Why Do Garage Door Sensor Lights Fail?
Garage door sensor lights fail for several reasons, and knowing the root causes helps homeowners catch problems before they lead to a full replacement.
Here are the most common reasons sensors fail:
- Moisture and extreme temperatures corrode internal components and cause misalignment
- Dust, cobwebs, and dirty lenses block the infrared beam and trigger false readings
- Physical impact cracks the housing and bends the brackets out of position
- Wiring issues and power surges cut the connection between the sensor and the opener
- Age and natural wear degrade the sensor’s ability to transmit the infrared beam
To learn more about what causes these issues, read our article on Common Garage Door Sensor Lights Problems to Know, which breaks down every common sensor problem and what it means for your garage door system.
Signs a Garage Door Safety Sensor Is Failing
Knowing the signs of a failing garage door safety sensor helps homeowners act before a minor issue turns into a full system problem.
Here are the signs to watch for:
- Sensor lights blink continuously or show no light at all
- Visible cracks, frayed wires, or bent brackets on the sensor unit
- Sensors fall out of alignment repeatedly, even after adjustments
- The door stops randomly or reverses without any obstruction in its path
- Sun damage has left the sensor lens discolored, cloudy, or brittle
Acting on these signs early protects the entire garage door system and prevents a sensor problem from escalating into a full garage door opener repair.
Garage Door Sensor Troubleshooting Steps Before Replacing
Running through a few basic garage door sensor troubleshooting steps before replacing anything can save homeowners unnecessary time and money.
Here are the steps to take before replacing:
- Wipe down the sensor lenses with a soft dry cloth to remove dust, dirt, and cobwebs
- Check both sensors for proper alignment and adjust the brackets until the lights are solid
- Inspect the wiring for any visible fraying, pinching, or loose connections
- Clear any objects or debris from the door’s path that may be disrupting the beam
- Reset the garage door opener to rule out any settings or power supply issues
To get a more detailed walkthrough of each step, read our article on How to Fix Garage Door Sensor Lights That Fail, which covers every fix and what to do when basic troubleshooting is no longer enough.
When to Replace Garage Door Sensor Lights
Lights Remain Blinking or Dead After Troubleshooting
Persistent blinking or a completely dark sensor after cleaning and alignment checks points directly to an internal failure that troubleshooting cannot fix.
Watch for these indicators:
- Both sensors fail to produce solid, steady lights after multiple adjustment attempts
- One sensor stays completely dark even after confirming the power supply is active
- Blinking continues regardless of how many times the beam path is cleared
- The door still refuses to close even when no obstruction is present
- Resetting the opener produces no change in the sensor light behavior
Solid, steady indicator lights are the only confirmation that the infrared beam is stable and the sensors are functioning correctly.
Physical Damage to the Sensor Housing or Wiring
Visible damage to the sensor unit means internal components have been compromised beyond what any adjustment or cleaning can address.
Look for these physical signs:
- Cracks in the sensor housing expose internal parts to moisture and dust
- Frayed or broken wires disrupt the signal between the sensor and the opener
- Bent brackets prevent the sensor from holding a stable alignment position
- Corroded terminals on the wiring connection affect the power supply to the unit
- Damaged lens covers block the infrared beam from transmitting accurately
Damaged sensor hardware puts the entire safety feature of the garage door system at risk and warrants immediate replacement.
Sensors Are Between 8 and 12 Years Old
Most garage door safety sensors reach the end of their functional lifespan between 8 and 12 years of regular use.
Age-related signs to watch for:
- Sensor lights that were once solid now flicker or dim without any clear cause
- Alignment adjustments hold for shorter periods over time
- Moisture and vibration have visibly worn down the sensor housing and brackets
- Infrared beam connectivity becomes inconsistent during routine opening and closing cycles
- Performance declines gradually, making the door increasingly unpredictable
Proactive replacement of aging sensors before visible failure occurs keeps the garage door system operating at full functionality.
Environmental and Sun Damage Has Broken Down the Sensor
Years of exposure to direct sunlight and harsh weather conditions degrade the sensor’s ability to accurately transmit and receive the infrared beam.
Environmental damage shows up in these ways:
- Sensor lens turns discolored or cloudy from prolonged UV exposure
- Housing develops surface cracks from repeated temperature fluctuations
- The infrared beam signal weakens on the side of the garage door during peak sun hours
- Door behavior grows inconsistent during extremely hot or cold days
- Sensor performance drops noticeably after heavy rain or humidity spikes
Environmental wear on sensor components is gradual, and a unit that shows visible deterioration has already lost a significant portion of its functional accuracy.
Door Is Operating Erratically or Intermittently
Unpredictable door behavior that continues after basic troubleshooting signals that the safety beam connection has become unstable.
Erratic operation looks like this:
- The door reverses mid-cycle without any object blocking the beam path
- Opening and closing cycles start normally, but stop without completing
- Opener responds to commands, but door movement remains inconsistent
- Safety beam connection drops in and out depending on temperature or humidity
- Door behavior changes from one use to the next without any adjustments being made
Intermittent operation tied to sensor failure signals that a replacement is the only lasting solution for restoring consistent door performance.
How Professionals Handle Garage Door Sensor Replacement
Professional technicians follow a structured process to make sure every garage door sensor replacement is done correctly and built to last.
Here is what professionals do during a sensor replacement:
- Inspect the full sensor system, including wiring, brackets, and mounting positions
- Match the replacement sensor to the make and model of the existing opener
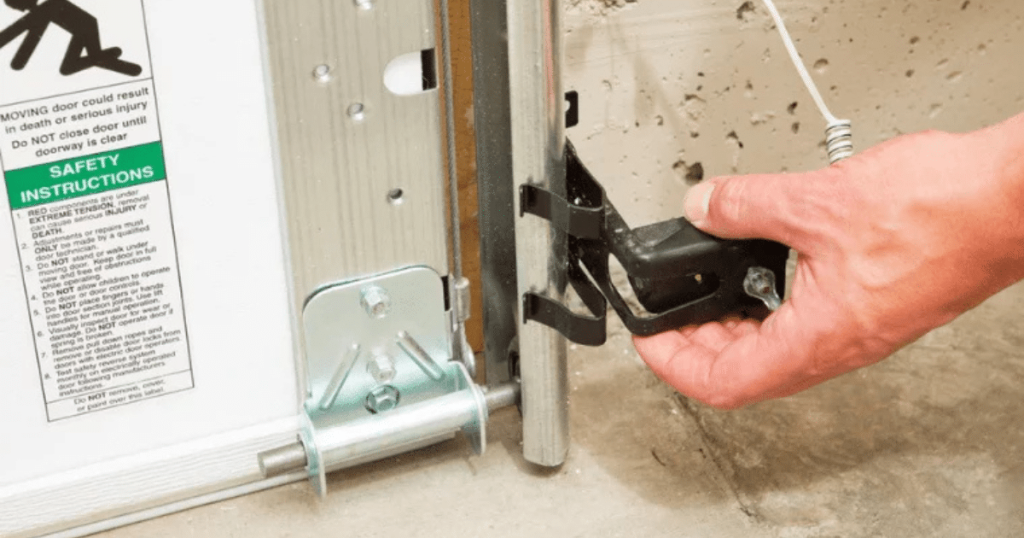
- Mount the new sensor at the correct height and secure it to the door frame bracket
- Calibrate alignment until both indicator lights are solid and the beam is fully connected
- Test the system to confirm the door reverses correctly when the beam path is interrupted
Every step in the professional replacement process ensures the sensors perform accurately and the garage door system operates without issues.
Garage Door Sensor Replacement Cost
The average garage door sensor repair cost depends on several factors, and understanding what drives the price helps homeowners make a more informed decision.
Here is what affects the overall cost:
- The brand and model of the replacement sensor influence the base price of the unit
- Older homes with outdated wiring may require additional work before installation
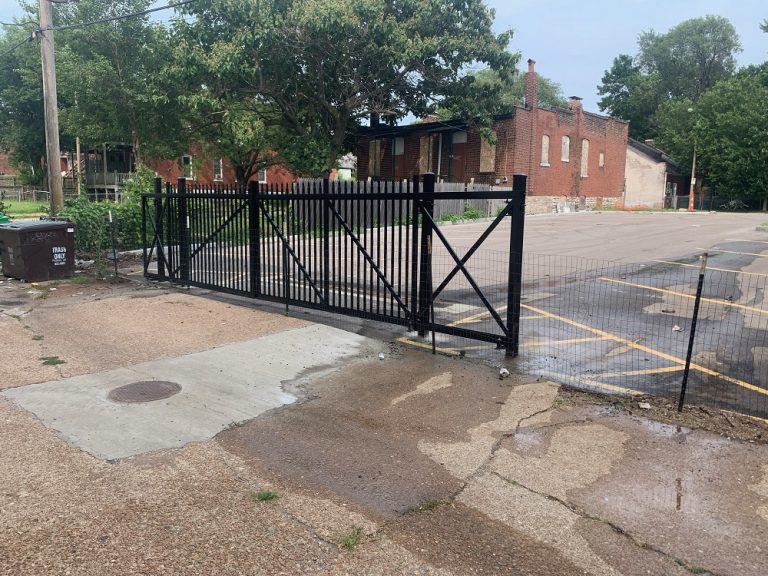
- Labor rates in the St. Louis, MO area vary depending on the complexity of the job
- Replacing both sensors at the same time affects the overall cost of the service
- The condition of the existing brackets and mounting hardware can add to the total
Getting a professional inspection before committing to any service is the most accurate way to understand what the job actually involves.
How to Maintain Garage Door Sensor Lights After Replacement
Keeping garage door sensor lights in good condition after replacement comes down to a few consistent maintenance habits that protect the system long term.
Here is how to maintain the sensors after replacement:
- Wipe down sensor lenses monthly with a soft, dry cloth to prevent dust and cobweb buildup
- Check indicator lights every few months to confirm alignment is still solid and steady
- Keep the area around the sensors free from moisture, debris, and direct sunlight
- Inspect the wiring and brackets periodically for any signs of wear or physical damage
- Schedule a professional inspection at least once a year to catch any potential issues early
Regular maintenance after replacement extends the sensors’ longevity and keeps the entire garage door system performing without disruption.
Is It Time to Replace Your Garage Door Sensor Lights?
Garage door sensor lights give clear signals when they are reaching the end of their lifespan, and recognizing those signals early puts homeowners in a much stronger position. Knowing when a sensor needs a full replacement is what keeps the entire system running without interruption.
Guardian Door and Gate serves St. Louis, MO homeowners with professional garage door sensor repair, replacement, and installation services backed by honest inspections and hands-on industry experience. Contact us or give us a call today, and let our team assess your sensor system and get your garage door performing at its best.
Frequently Asked Questions
How do I know if my garage door sensor needs replacing rather than just cleaning?
If cleaning and realignment do not restore the indicator lights to a solid state, the sensor likely has an internal failure. A unit that continues to malfunction after basic maintenance is a strong sign that replacement is the right course of action.
Is it normal for a garage door sensor orange light to disappear after years of use?
No, a garage door sensor orange light that fades or disappears on an aging unit signals that the sending sensor is losing power or has developed an internal fault. A sensor that no longer shows its indicator light consistently should be inspected and replaced promptly.
Do garage door sensors need to be replaced in pairs?
Not always, but replacing both units at once is often the more practical choice. If one sensor has failed due to age or environmental wear, the other unit is likely in a similar condition and may fail shortly after.
Can a garage door sensor be too old to align properly?
Yes, sensors that have surpassed their functional lifespan lose the ability to maintain consistent alignment. Internal component degradation makes it increasingly difficult for aging sensors to maintain a stable infrared beam connection.
What happens to the garage door system if a failed sensor is left in place too long?
A failed sensor left in place forces the opener to operate without a functioning safety beam, which puts everyone near the door at risk. Prolonged use with a faulty sensor also adds unnecessary strain to the opener motor and other mechanical components.
Can a garage door sensor yellow light indicate that a sensor needs to be replaced?
Yes, a persistent garage door sensor yellow light that does not resolve after cleaning and alignment checks points to a deeper internal issue. A sensor that continues showing a yellow indicator after all basic checks have been completed is likely due for replacement.
How can a homeowner prepare for a professional sensor replacement visit?
Clearing the area around both sensors and the garage door opener before the technician arrives speeds up the inspection and replacement process. Having the make and model of the existing opener available also helps the technician confirm compatibility with the new sensor unit.
Does the position of a replacement sensor matter during installation?
Yes, sensors must be mounted no higher than six inches from the ground on each side of the door frame to function correctly. Incorrect positioning prevents the infrared beam from connecting properly, causing the door to behave erratically after installation.
How soon after replacement should a garage door sensor be tested?
Testing should happen immediately after installation is complete. A professional technician will place an object in the door's path to confirm the door reverses correctly and both indicator lights are solid before completing the service.