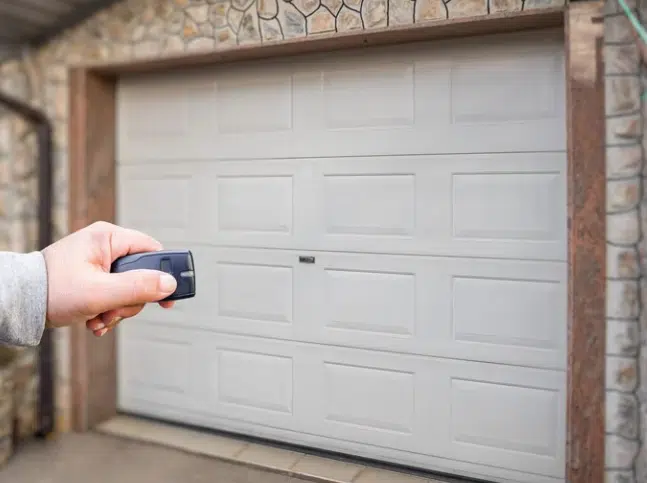
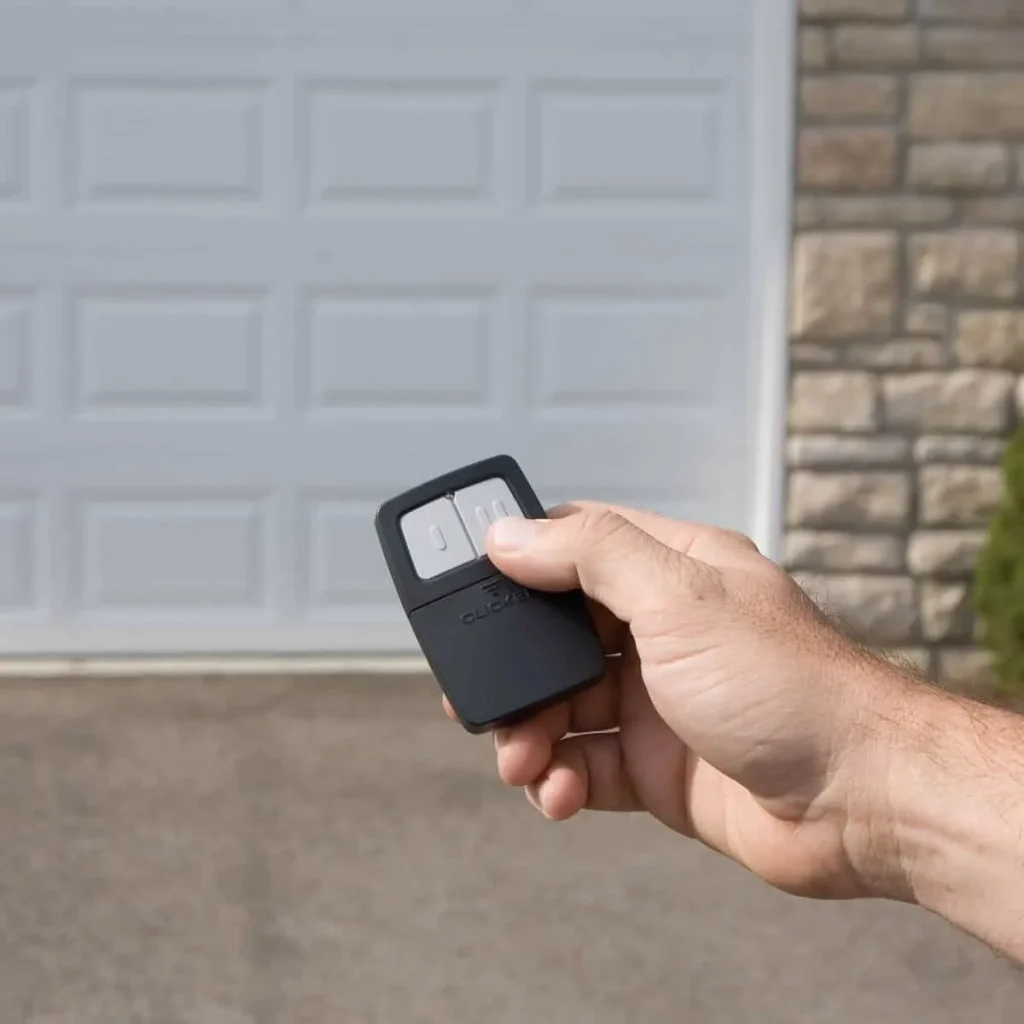
Programming a LiftMaster garage door opener remote control is a task every homeowner will need to handle at some point, whether setting up a new remote or getting an existing one back online. Knowing the correct steps from the start makes the entire process quicker and prevents repeated failures down the road.
When programming attempts keep failing, it can sometimes point to a deeper issue that requires professional garage door opener repair from a trained technician. This guide covers everything you need to know about how to program a LiftMaster garage door opener remote, from compatibility checks to the full step-by-step programming process.
Why Is Your LiftMaster Garage Door Opener Remote Control Not Working?
A LiftMaster garage door opener remote control can stop responding for several reasons, and identifying the exact cause helps you decide whether programming alone will fix the problem or if something else needs attention first.
The most common reasons your LiftMaster remote stops responding include:
- Dead or weak batteries prevent the remote from sending a signal to the opener
- A power surge or outage wipes the opener’s memory and unpairs all connected remotes
- Nearby LED light bulbs or wireless devices interfere with the remote’s radio frequency
- Using the remote too far from the motor unit weakens the signal significantly
- Physical damage to the remote control button or internal components blocks the signal
- A damaged or improperly hanging antenna wire prevents the opener from receiving transmissions
To understand what each of these causes means for your situation, read our guide on LiftMaster Garage Door Opener Remote Control Not Working?, which covers every trigger behind a non-responsive remote and walks you through what to do next.
Always Reset Your LiftMaster Remote Before Reprogramming
Skipping the reset is one of the main reasons reprogramming fails, and following the correct steps gives your remote a clean slate before pairing it again.
The reset process for your LiftMaster remote follows these steps:
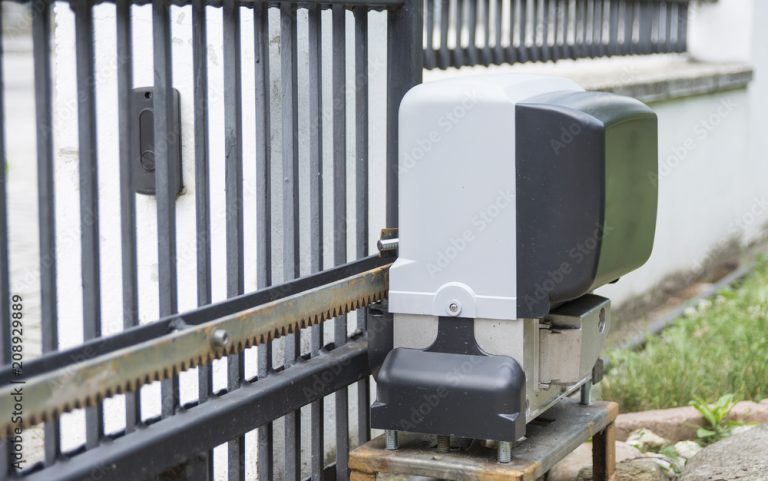
- Locate the learn button near the antenna wire on the motor unit
- Press and hold the learn button until the LED indicator light turns off to confirm the memory is cleared
- Release the button and wait a few seconds for the opener to finish the memory wipe
- Press and immediately release the learn button to activate programming mode until the LED glows steadily
- Press the desired remote button within 30 seconds to sync it to the opener
To clear your opener’s memory the right way before reprogramming, read our guide on How to Reset a LiftMaster Garage Door Opener Remote, which walks through every step and explains what to expect after the reset is complete.
What to Check on Your LiftMaster Garage Door Opener Remote Before Programming
Jumping straight into programming without checking these key things first is the fastest way to run into repeated failures and wasted effort.
The most important things to check before programming include:
- Confirm the remote model is compatible with your specific LiftMaster opener model number
- Make sure the battery is fresh and properly seated inside the battery cover
- Inspect the remote casing and buttons for visible cracks, damage, or corrosion
- Locate the learn button on the motor unit, since programming cannot proceed without it
- Determine if a replacement remote control for the LiftMaster garage door opener is needed before starting
Running through this checklist before starting saves time, and homeowners dealing with a completely unresponsive door may also need to look into garage door repair before assuming the remote is the only issue.
How to Program a LiftMaster Garage Door Opener Remote Control
Step 1: Locate the Learn Button on Your Opener Unit
Knowing exactly where the learn button is before starting prevents delays once the programming process begins.
Key things to know when locating the learn button:
- Most motor units have the learn button positioned near the hanging antenna wire on the back panel
- Learn button colors vary by model and include yellow, red, green, orange, and purple
- Older units may have the button hidden behind a light lens or panel cover
- A ladder is often needed since most openers are ceiling-mounted
- The LED indicator light sits directly beside the learn button on most LiftMaster models
Locating the learn button in advance ensures the 30-second programming window is not wasted searching for it.
Step 2: Activate Programming Mode
A quick and correct press of the learn button is all it takes to open the pairing window on the opener.
What happens during programming mode activation:
- A quick press and release of the learn button activates programming mode immediately
- The LED indicator light glows steadily once programming mode is active
- Programming mode stays open for exactly 30 seconds before timing out
- Pressing any other button on the wall panel cancels programming mode instantly
- Repeating the press is necessary if the LED indicator light does not glow
Acting within the 30-second window after activation determines whether the remote successfully syncs with the opener.
Step 3: Pair the Remote to Your Opener
Holding the remote button long enough and staying within range ensures the opener registers the signal before the window closes.
Important things to do during the pairing step:
- Hold the desired remote control button down firmly without releasing too early
- Stay within close range of the motor unit while pressing the remote button
- Keep the remote pointed toward the opener for the strongest possible signal
- Wait for a visible or audible confirmation before releasing the button
- Avoid pressing multiple buttons on the remote during the pairing window
Holding the remote button consistently for the full 30-second window determines whether the pairing completes on the first attempt.
Step 4: Watch and Listen for Confirmation
Recognizing the correct confirmation signals from the opener tells you the remote has been successfully paired.
Confirmation signals to watch and listen for:
- Opener lights flash twice to signal a successful pairing with the remote
- Two audible clicks from the motor unit confirm the remote has been registered
- The LED indicator light turns off on some models once pairing is complete
- No response after 30 seconds means the process needs to be repeated from Step 2
- A single flash without a follow-up signal means the pairing was not completed fully
Releasing the remote button before getting a full confirmation signal is the most common reason the programming process needs to be repeated.
Step 5: Test Your Remote
Testing the remote after programming confirms the garage door opener responds correctly across normal operating distances.
Steps to follow when testing the programmed remote:
- Move to a normal operating distance from the opener before pressing the programmed button
- Press the remote button once and watch for an immediate response from the garage door
- Test the remote from multiple distances to confirm consistent signal strength
- Check that the door completes a full open and close cycle without stopping midway
- Repeat the full programming process from Step 1 if the door does not respond
Completing a full open-and-close cycle from different distances confirms that the LiftMaster garage door opener remote control is fully synced and working correctly.
What to Do When Standard Programming Does Not Work for Your LiftMaster Remote
Standard programming does not always work, and knowing why helps resolve the issue without starting over every time.
Common reasons standard programming fails and what to do:
- A previously owned remote carries old programming that blocks pairing, so a full reset is required first
- Programming multiple remotes requires each one to go through the process individually, without resetting in between
- A lost remote requires a full opener reset before a replacement remote can be paired fresh
- A remote that lost connection after a power outage needs a reprogram rather than a full replacement
- Older units with full memory reject new remotes until unused codes are cleared first
Working through each of these scenarios prevents unnecessary replacements, and persistent opener issues beyond the remote may indicate the need for emergency garage door repair by a trained technician.
Signs You May Need a LiftMaster Garage Door Opener Remote Replacement
Not every programming failure points to a setup error, and some signs indicate the remote itself has reached the end of its useful life.
Signs that point to a needed replacement include:
- Remote works inconsistently even after completing a fresh and correct programming process
- Buttons feel stuck, unresponsive, or require multiple presses to produce a response
- Visible cracks, water damage, or corrosion on the battery contacts reduce signal output
- Reprogramming the remote multiple times using the correct steps produces the same failed result
- Other remotes paired to the same opener work perfectly, while this specific one does not
To find out when replacing your remote is the practical next step, read our guide on When to Replace Your LiftMaster Garage Door Opener Remote, which covers every warning sign to watch for before the remote fails completely.
How to Keep Your LiftMaster Remote Working After Programming
Proper care after programming extends your remote’s life and reduces the risk of losing connection again.
Best practices to keep your LiftMaster remote working long after programming:
- Replace the battery annually to maintain a consistent signal strength
- Keep the remote away from water, heat, and humidity to protect internal components
- Avoid dropping the remote since repeated impacts loosen internal components over time
- Store the remote in a consistent location to prevent loss and unnecessary damage
- Test the remote monthly to catch performance issues before they lead to full failure
Consistent care after programming keeps the remote performing at full strength, and a door that struggles to open or close despite a working remote may have broken springs as the underlying cause.
Program Your LiftMaster Garage Door Opener Remote the Right Way and Avoid Future Access Issues
Following the correct programming steps from reset to final test keeps your LiftMaster garage door opener remote control working without repeated failures. Knowing what to check, when to reset, and how to complete the full process eliminates unnecessary guesswork every single time.
Guardian Door and Gate proudly serves St. Louis, MO, homeowners with professional garage door services, including remote programming, opener repairs, and full system installations. Our team knows LiftMaster systems inside and out, so contact us or give us a call today and let us handle everything from a simple remote pairing to a complete opener fix.
Frequently Asked Questions
How do I know if my LiftMaster remote is in programming mode?
The LED indicator light next to the learn button will glow steadily once programming mode is active. If the light does not glow after pressing the learn button, the opener may not be receiving power, or the button may need to be pressed again.
Why does my LiftMaster remote program work successfully but stop working the next day?
A weak or failing battery is the most common reason a remote loses its connection shortly after liftmaster garage door opener remote control programming is completed. Replacing the battery with a fresh one before programming ensures the remote maintains a consistent connection.
Can I program a LiftMaster remote to more than one garage door opener?
Yes, a single LiftMaster remote can be programmed to operate multiple openers, as long as each opener is programmed individually. Each opener must have its learn button activated separately to register the same remote into its memory.
What frequency does a LiftMaster garage door opener remote use?
Most LiftMaster remotes operate on either 315 MHz or 390 MHz, depending on the model and production year. Checking the label on the motor unit or the LiftMaster manual confirms which frequency your specific opener supports.
Does reprogramming a LiftMaster remote delete all other paired devices?
No, reprogramming a single remote does not delete other paired devices from the opener's memory. Only by pressing and holding the learn button to perform a full reset will all paired remotes and accessories be cleared.
How do I know if my opener supports newer remotes after a frequency upgrade?
Checking the motor unit's model number against LiftMaster's compatibility list confirms whether the opener supports newer remote frequencies. Knowing how to reprogram LiftMaster garage door opener remote after a frequency upgrade also requires verifying that the opener's technology matches the remote's signal type before attempting to pair them.
What should I do if the opener lights do not flash after programming?
Starting the entire process again from Step 1 is the most practical approach when the opener lights do not flash after a programming attempt. The two most common fixes for this issue are to act within the 30-second programming window and hold the remote button firmly.
Can I get a replacement remote control for LiftMaster garage door opener from a third-party retailer?
Yes, third-party retailers carry compatible replacement remotes, but it's important to confirm compatibility with your specific opener model before purchasing. Buying directly from an authorized LiftMaster dealer guarantees full compatibility and proper signal support.
How do I perform a LiftMaster garage door opener remote reprogram after moving into a new home?
Performing a full reset of the opener first removes all previously paired remotes from the prior owner before adding new ones. After the reset is complete, follow the standard five-step programming process and pair the new remote with the opener without interference from old codes.